A case study by Tim Dubitsky
GlassLab provides designers with rare access to explore concepts in glass. In public “design performances” or private workshops, designers and glassmakers collaborate, rapidly prototyping design concepts and using the immediacy of hot glass as a catalyst for innovation. Using a mobile hot glass studio, GlassLab sessions have taken place in public design venues like Design Miami/Art Basel Miami and Cooper-Hewitt National Design Museum, offering audiences a live, authentic glimpse of the design and glassmaking processes, while allowing designers to explore the material of glass in a way that few have access to. – Corning Museum of Glass
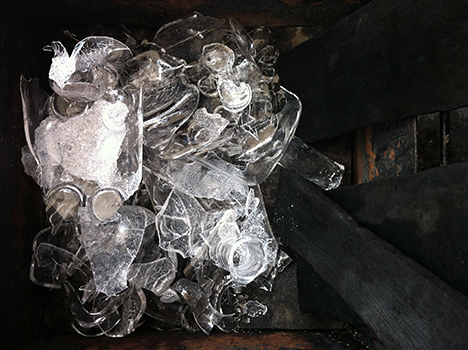
I live in North Kohala on the Big Island of Hawai’i. I grow food, I chase sunsets and I brew. When it came time to source bottles for my first batch of ginger beer, I went to the transfer station to intercept a few before they were hauled off for recycling. While chatting with the manager, I learned that shipping costs prohibit the bottles from leaving the island, and instead they’re pulverized and sold as raw material. (There’s rumor of a man laying a shiny road on the island, will keep you posted…) Hearing this while living in a community practicing permaculture and preservation, I was inspired to dust off an old idea.
In 2008 I had a moment of gin-spiration. I was at a gathering watching a group of architect friends attempt to redeem the collegiate party pastime of beer can stacking and I began thinking how much more interesting the game would be if the cans interlocked, if they were more like Legos. Shortly after, I came across the (loose) statistic that “every month [in America], we throw out enough glass bottles and jars to fill up a giant skyscraper.” So when I was invited to participate in GlassLab at the Corning Museum of Glass (CMOG) I accepted without hesitation, eager to bring my bottle brick to life and build that skyscraper rather than fill it. The following is my process from concept to prototype.
Like many before, this process began on a napkin. The first study was a simple cartoon of a bottle and a Lego on a date. I thought if all goes well, this design will work itself out.
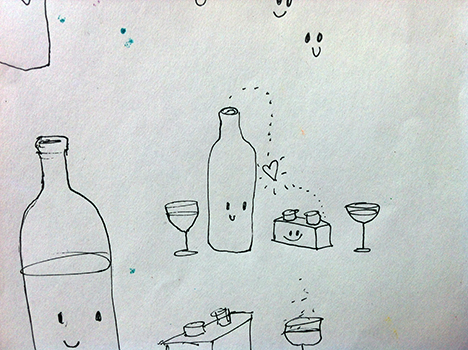 Imagined first date between a bottle and a toy.
It turned out that more action was required on my part, so in preparation for my GlassLab sessions I spoke with gaffer Eric Meek at CMOG. To best execute this design, we would need a mold. Our best material options for glassmaking molds included wood, plaster and graphite. I decided on a wood mold as this current design is conceptual and would deserve a more adept design before committing to the more expensive—but lasting—graphite mold. The ultimate goal for the bottle is to become ubiquitous and a readily upcyclable, viable building material, but at this stage I was interested in starting a conversation to garner the resources in order to move to the next step.
We decided on a three-part hardwood mold. Eric estimated the wood could withstand the 2,100 degree glass for roughly 6-8 castings. To produce the mold I turned to Tietz-Baccon, a design and digital fabrication studio in Long Island City, NY. After the initial conversation with T-B, I elaborated on the first-date sketch, snapped it with my phone and emailed it across the Pacific. Between a phone call, a quick sketch and a snapshot, this idea was coming to life.
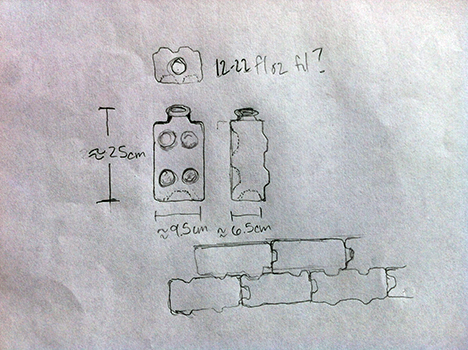 Follow-up sketch sent to Tietz-Baccon
A few days later I received the CAD renderings and technical drawings from Tietz-Baccon. We increased the scale of the bottle so that it would be easier to work with by hand out of a mold.
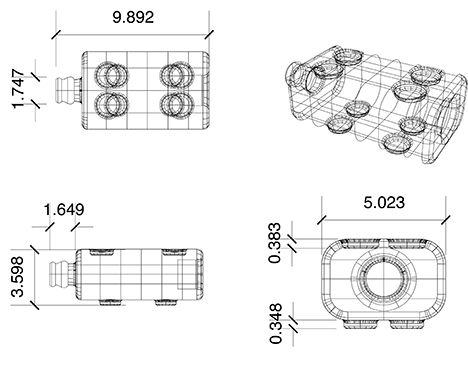 Technical drawing, Tietz-Baccon
 Rendering 1, Tietz-Baccon
 Rendering 2, Tietz-Baccon. Just like my napkin sketch. I don’t see any difference…
We decided on a dense cherrywood for the mold because of its ability to withstand the heat of the molten glass without burning away too quickly. The job was cued up, and by the time I would arrive in New York City a few days later, it was complete. The CNC milling required 8 hours, with an additional 4 hours of finishing and construction. When I arrived to the T-B studio, I was greeted with a thing of true beauty:
 The sacrificial lamb, closed.
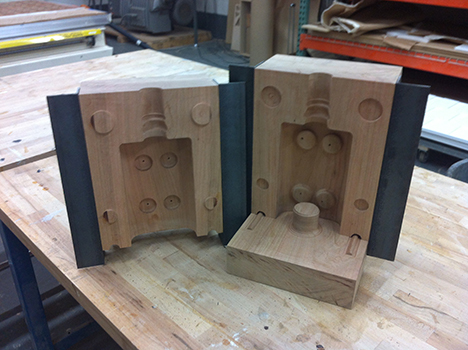 Mold, open.
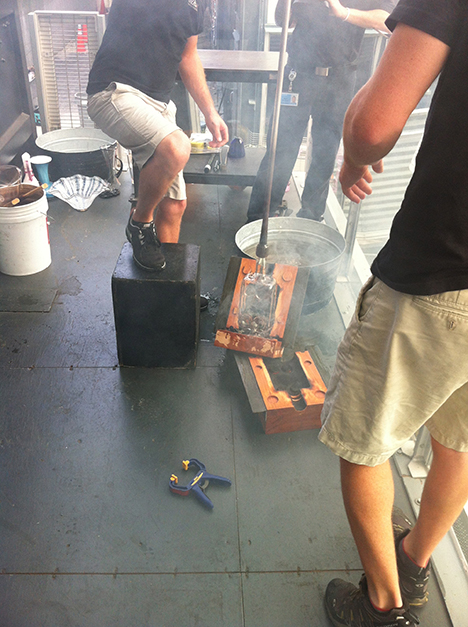
When I arrived at CMOG in Corning, NY, I conferenced with my team of gaffers. First we would need to soak the mold in water to help reduce the rate at which the heat would burn through the mold.
Next we toasted it a bit with a torch to create a seal, much like searing a steak to lock in the moisture.
 The char-sealed mold.
A small amount of glass was gathered on the end of a blowpipe. The gaffer gave a puff into one end of the blowpipe and quickly seals the passage so that the pressure of the hot air begins to blow a bubble on the gathered end.
 Gaffer Chris shaping the first gather.
The blob returned to the crucible in the furnace to gather more glass, then the gaffer used wood blocks and newspaper to encourage the general shape and size of the bottle. For our bottle brick, we gathered twice.
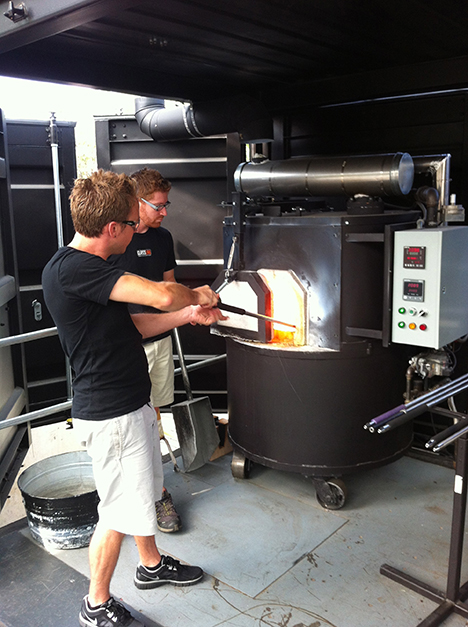 Gaffers Chris Rochelle and Dane Jack gathering glass from the crucible.
 Using different tools and techniques, the glass is formed to a general shape to fit the mold.
When the glass was roughly the size to fit in the mold, one gaffer lowered the glass into the mold from above. Once the mold was closed and clamped, the gaffer worked quickly to blow the glass into shape before it cooled down and was too hardened with which to work.
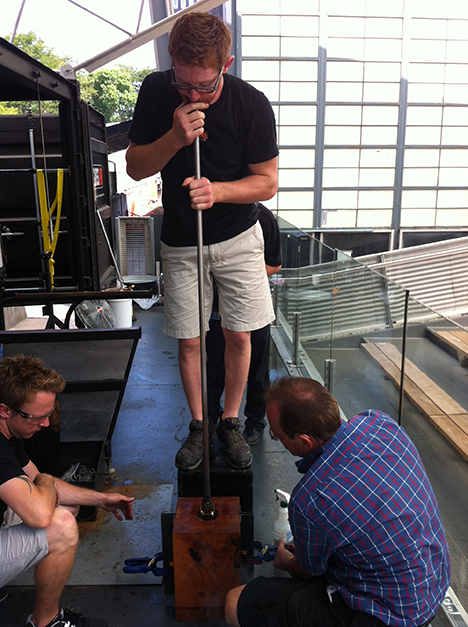 One gaffer lowering the glass while two secured the mold. Gaffer Lewis Olson jumped in to give a hand.
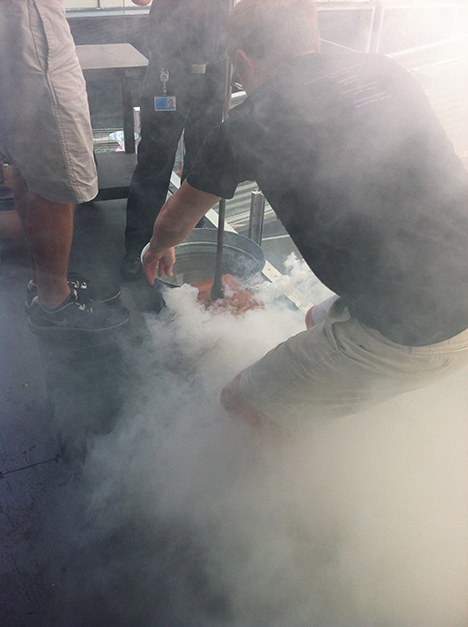 You know what they say—Where there’s smoke, there’s a cherrywood glass mold expelling moisture.
Watching gaffers is like watching a ballet, shouting out positions, one-word next-steps and sometimes saying nothing, but just watching and knowing. The process is very fast, and if the glass cools too quickly you’re looking at a pile of shards which can return to the oven to become part of another batch of glass.
 Releasing the first trial from the mold.
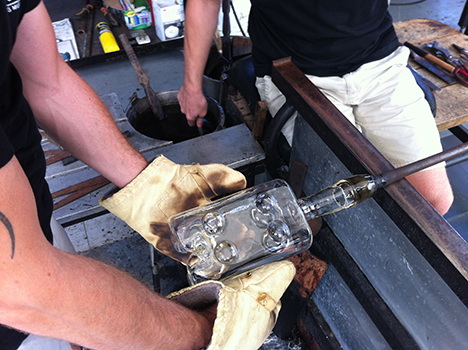
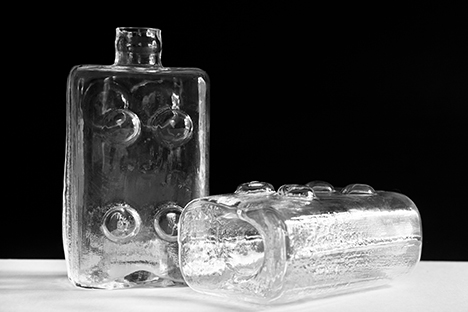
During the first two-hour session, we were able to get 8 bottles. The mold was holding up better than we expected, so we decided to use it into the second session. This gave us the opportunity to make adjustments to the mold to improve our results. The “push” in the bottom of the mold—which creates the female end in the bottom of the bottle—was a little too close to the side of the mold and was not allowing the glass to slump to the bottom and fill out completely. The result was a cleft around the bottom of the bottle.
 The cleft in the bottom of the bottle caused by a tight fit between elements of the mold.
To remedy this, we cut the raised part of the mold in half and used the waste to make a tool to push the bottom in manually.
Another issue was that the size of the top opening in the mold was too small to allow the moile (the glass gathered around the end of the blowpipe) to fit when the mold was closed. This caused us to raise the moile above the opening, which was not leaving our hot glass in the right position for a perfect casting. We fixed this with a quick pass of a rasp bit on a power drill to widen the opening.
Having modified the mold, we were able to get a few perfect bottles just as the grain of the wood from the burning away of the mold started showing up in the glass. By the end of the second session, we had exhausted the life of the mold, but were left with enough successful pieces to demonstrate the functionality of the bottle design.
The bottles were left in the annealing oven to cool at 900 degrees for 10 hours. Cooling too quickly would cause the glass to crack or shatter.
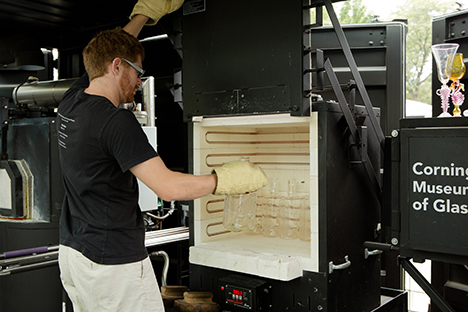 Gaffer Dane placing the fresh pieces in the annealing oven.
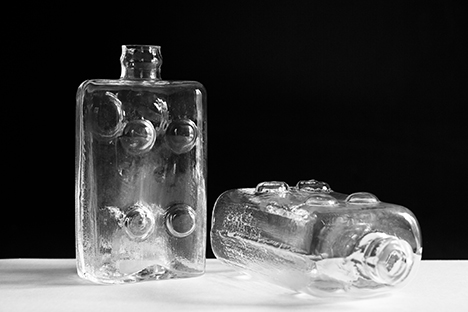
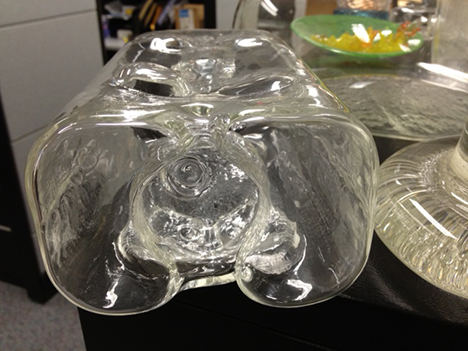
Once cooled, they were taken to a studio for cold work. The bottle necks were trimmed and ground down to a smooth finish.
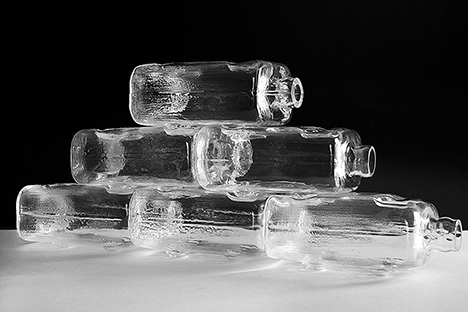
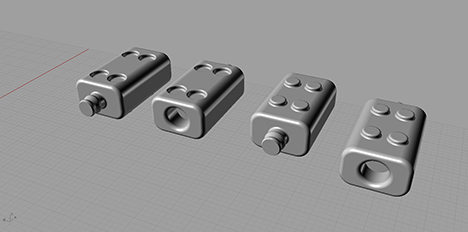
Finished bottle brick prototypes.
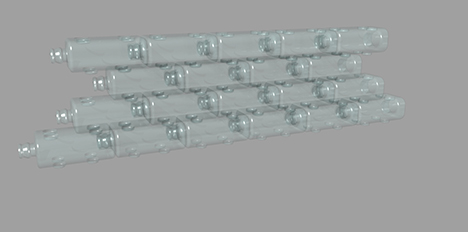
The rapid prototyping at GlassLab was a success. For the next step I am seeking out a material specialist in glass who could tweak the design for real life application considering both pressure testing and the interlocking functions. With a more perfect design in place, I will produce a graphite mold for more lasting use. I’m looking forward to the day when architects and interior designers spec upcycled bottles from the dump…
About Tim Dubitsky
Tim Dubitsky is returning to Jim Channon’s Artesea in Hawi, Hawai’i where he is eager to check on his poha berry patch.
via Core77